Wiliot
Wiliot is an Internet of Things company that is known for their IoT Pixels (labels) amongst other solutions. The great benefit of the pixel is that it is a battery free and label-size (compact) Bluetooth "tag" (that broadcasts Bluetooth beacons with telemetry data).
- To power the IoT Pixel, you need a bridge ("energizer") device. It provides "energy" over radio waves and powers the IoT pixels from a distance.
- To forward IoT Pixel's data to the server ("dashboard"), you need a gateway device. It establishes the connection with the server using a TCP/IP connection, and forwards label's payloads that contain sensor's data (like temperature).
Both operation modes can be performed by a single device, or by separate devices.
RouterOS allows the usage of Wiliot gateway and bridge modes on devices that have Bluetooth support.
Wiliot gateway mode is responsible for establishing the connection with the MQTT server (by registering the gateway through the API, obtaining required tokens and credentials, and authorizing the device). It is also responsible for forwarding Pixel's Bluetooth payloads that it captures over the air via the established MQTT connection, and for relaying additional commands it might get from the subscribed MQTT topic via Bluetooth advertising.
Wiliot bridge mode is responsible for providing energy over the frequency and keeping the IoT Pixels powered.
bridge mode is not implemented yet.
Step by step
Step by step requires two quick steps:
- To register the device and activate the MikroTik board;
- To set up IoT Pixels.
Step #1, Gateway Registration
On the Wiliot portal
- Login to the Wiliot registration page → https://deployment-tool.wiliot.com
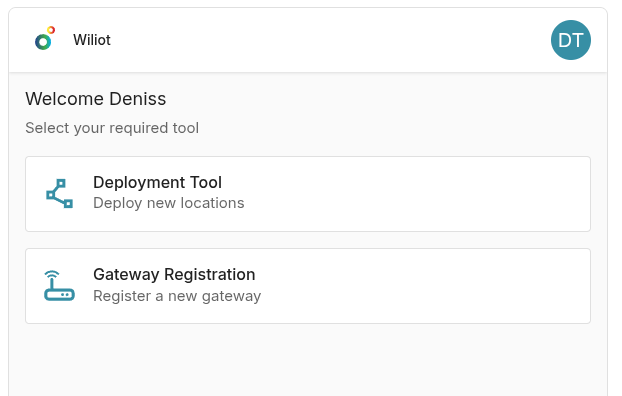
- Select "Gateway Registration".
- Select "Manual input" (top right corner of the screen).
- Enter "Gateway ID".
You can copy "Gateway ID" from the RouterOS settings (gateway-id field):
[admin@MikroTik] > /iot wiliot configuration print
status: inactive
gateway-id: XXXXXXXXX
: mikrotik-knot-embedded
owner: xxxx
spoof-gps: xx
lat: xx
long: xx
token-refresh-handicap: 3600
server: Wiliot US East
scanner: bt1
advertiser: bt1
wi-fi: none
features: gateway
- The new gateway should appear on the platform in the "pre-registered" state → https://platform.wiliot.com/edge/gateways
In the RouterOS
You can navigate the settings using different tools. The advised way of management is by using Winbox software. Download the tool using this link and run it. Connect your PC with an "ethernet" cable to any port beginning with ether2+ (avoid using ether1 as, in most cases, it is configured as a WAN port and is restricted by the firewall, while the rest of the ports are LAN ports with open access and DHCP-server enabled), or connect using Wi-Fi (if the board has a Wi-Fi chip).
In Winbox, navigate to the "Neighbors" tab (Select from: Neighbors), find the MAC-address of your MikroTik board (which is printed on the label on the device), click on the MAC-address, enter login credentials (also printed on the label) and "connect" to it.
From here, you can use "GUI" or "CLI" commands. The guide shows "CLI" command examples, which you can run by opening "New Terminal" from the Winbox options. However, the exact same sections and tabs are available in GUI as well. For example, if the command is shown as "/iot/wiliot/enable", go to the IoT→ Wiliot tab and click on the "enable" button.
- Enable "wiliot" functionality.
[admin@MikroTik] > /iot/wiliot/enable
- Confirm that the device successfully obtained a token, was authorized and connected to the MQTT server with the "active" status (
status: active).
[admin@MikroTik] > /iot/wiliot/configuration/print
status: active
gateway-id: XXXXXXXXX
: mikrotik-knot-embedded
owner: xxxx
token-refresh-handicap: 3600
server: Wiliot US East
scanner: bt1
advertiser: bt1
wi-fi: none
features: gateway
Gateway status should change from "pre-registered" to "approved" (or/and to "online") on the Wiliot platform → https://platform.wiliot.com/edge/gateways
Step #2, Adding IoT Pixel (label)
On the Wiliot portal:
- Login to the Wiliot platform and navigate to the "Category" tab → https://platform.wiliot.com/categories. Add a new "Category" ("Add new"). Name it and select a required category type.
- Navigate to the "Pixels" tab → https://platform.wiliot.com/edge/pixels. Check the "ID" of your label. Labels should be already assigned to your account.
- Go to "Assets" tab → https://platform.wiliot.com/assets. Create a new asset ("Add New"). Select/link the asset to the previously created "Category", enter "Asset ID" (or generate a random one) and select pixel's ID from the list.
- By clicking on the created "asset" entry (once the label is energized and gateway is ready), you will be able to see label's readings (temperature, etc.).
RouterOS settings
Sub-menu: /iot/wiliot
note: iot package is required.
| Property | Description |
|---|---|
| configuration | General Wiliot gateway/bridge settings. |
| servers | MQTT server configuration. |
| bluetooth traffic | Bluetooth traffic menu. |
| mqtt traffic | MQTT traffic menu. |
Configuration (General options)
To enable the configuration, use the command:
/iot/wiliot/enable
To disable it:
/iot/wiliot/disable
To clear (purge) MQTT connection/authentication data (only usable when "disabled"):
/iot/wiliot/disable
/iot/wiliot/clear
After "clearing" the configuration, you will have to delete the gateway (https://platform.wiliot.com/edge/gateways) and re-register the gateway anew (https://deployment-tool.wiliot.com/).
Configuration properties can be applied using the "set" command (only usable when "disabled"):
/iot/wiliot/set
Example:
/iot/wiliot/set features=gateway
| Property | Description |
|---|---|
| advertiser (Default: bt1) | Select Bluetooth interface which will be used for advertising (relaying commands obtained from the MQTT server). |
| scanner (Default: bt1) | Select Bluetooth interface which will be used for scanning (capturing Pixel's payloads). |
| spoof-gps (yes | no; Default: no) | Choose whether to use manual GPS coordinates, which are going to be delivered to the server. |
| lat (Default: ) | Set GPS latitude value to be included during connection with the server when using "spoof-gps". |
| lon (Default: ) | Set GPS longitude value to be included during connection with the server when using "spoof-gps". |
| features (gateway | bridge ; Default: ) | Select a role for the device:
Caution: bridge mode is not implemented yet. |
| server(Default: ) | Set the server for the MQTT connection. |
Servers
To change MQTT server's settings:
| Property | Description |
|---|---|
| address (Default: ) | IP/domain name address of the MQTT server. |
| certificate (Default: ) | Specify certificate to be used for the SSL MQTT connection if required by the server. |
| name (Default: ) | Server's name. |
| port (Default: ) | TCP port used by the MQTT server. |
| ssl (yes | no; Default: ) | To enable SSL communication with the server. |
Bluetooth traffic
Displays nearby IoT Pixel raw data:
/iot/wiliot/traffic/print
Columns: TIME, ADDRESS, RSSI, PAYLOAD
 #  TIME        ADDRESS            RSSI    PAYLOAD
 0  2026-01-07  E9:B7:32:XX:XX:XX  -34dBm  1E 16 C6 FC 03 00 7C 7B 3C 22 0E D8 54 38 B0 03 E0 DA 8C 06 36 B4 CF AC 8A D6 76 54 BD FC B9
    14:23:26
 1  2026-01-07  E9:B7:32:XX:XX:XX  -41dBm  1E 16 C6 FC 03 00 3C DB 7D 72 BF A0 C1 62 9C 5F B6 D5 90 00 C1 62 BF 68 EC E5 64 02 63 F9 C3
    14:23:26
 2  2026-01-07  E9:B7:32:XX:XX:XX  -42dBm  1E 16 C6 FC 03 00 3C A8 3B 27 17 25 BC 6D 01 F5 49 E1 98 03 CA 3C 64 04 30 B2 E1 86 FC 80 CB
    14:23:28
 3  2026-01-07  E9:B7:32:XX:XX:XX  -33dBm  1E 16 C6 FC 03 00 3C F5 AF 22 CC E2 60 FA BC 4E 57 F7 8C 01 80 6A 21 EF 82 CB 62 2A 16 5A 3F
    14:23:29
 4  2026-01-07  E9:B7:32:XX:XX:XX  -33dBm  1E 16 C6 FC 03 00 3C FC AC 9A 1B 9A BD 2C DE B7 02 FF 7C 03 C7 28 BD AB 20 1B 91 89 B9 ED 88
MQTT traffic
Displays MQTT traffic:
/iot/wiliot/mqtt-traffic/print
   time: 2026-03-02                                                                                                                      >
         07:37:43                                                                                                                        >
  topic: update/mikrotik/XXXXXXXXXXX                                                                                                     >
   data: {"txPacket":"1E16C6FC0000ED070C3443B7D39DE2CE08993D7F40B2F56B822096AA19CD00","txMaxRetries":8,"txMaxDurationMs":700,"action":0} >
Debugging
You can enable "wiliot" debug logging, using the command:
/system/logging
add topics=wiliot
As a result, you should see more detailed entries in the logs (/log/print command):
 2026-02-12 12:04:54 wiliot,debug [CFG] authorizing...
 2026-02-12 12:04:54 wiliot,debug [CFG] authorization complete
 2026-02-12 12:04:54 wiliot,debug [CFG] registering...
 2026-02-12 12:04:55 wiliot,debug [CFG] registration complete
 2026-02-12 12:04:55 wiliot,debug [CFG] polling for token...
 2026-02-12 12:04:55 wiliot,debug [CFG] token obtained
 2026-02-12 12:04:55 wiliot,debug [CFG] ownerId
 2026-02-12 12:04:55 wiliot,debug [CFG] authorization complete
 2026-02-12 12:04:55 wiliot,debug [CFG] updating MQTT credentials
 2026-02-12 12:04:56 wiliot,debug [CFG] MQTT credentials updated
 2026-02-12 12:04:56 wiliot,debug [CFG] connecting to MQTT server
 2026-02-12 12:04:56 wiliot,debug [CFG] subscribing to BLE advertaisments
 2026-02-12 12:04:56 wiliot,debug [CFG] active
Certificates
Wiliot functionality initiates HTTP posts using /tool/fetch and establishes an MQTT connection using /mqtt. Both HTTP and MQTT require SSL certificates. RouterOS has a "builtin trust store" which contains all the required certificates from the get-go.
By default, "all" services should be allowed to use the built-in certificate store, so you do not have to do anything. However, if you decide to restrict that (if you decide not to allow "all" services to have access to the "store"), for "wiliot" to work, you need to enable "wiliot", "mqtt" and "fetch" services (or disable builtin-trust-store and upload certificates manually):
[admin@MikroTik] > /certificate/settings/print
  builtin-trust-store: fetch
                       mqtt
                       wiliot
         crl-download: no
              crl-use: no
            crl-store: ram